Showing posts with label arts and crafts. Show all posts

Monday, March 23, 2009

Decorating the apartment for spring

Remember how we're going to have Kusudama flower balls as aisle directions for our wedding? I also wanted to make some to decorate our apartment for spring.

I used a different set of little origami papers this time to make 4 halves of a Kusudama flower ball.


I decided to hang them over the entrance to the kitchen. So I measured and then cut out lengths of ribbon (bought on sale at Michael's) for each ball half to be glued to.


My first attempt at securing the balls was to simply loop the ribbons through the cable wiring at the ceiling edge over the kitchen entrance. My plan was to just glue the halves of the balls to the ends of the ribbons and let them hang.


This idea didn't work so well. While each half fits together pretty snugly, it's not a precise fit. Also the glue didn't dry quickly enough to actually secure the ribbon to the paper or the ball halves to each other.


I had to regroup, so I took the ribbons off the cable wires and glued everything together on our coffee table (e.g. temporary crafting table) and let it sit overnight to properly dry.


The next day, I pulled the loop through the cable wire and then pulled the flower ball through the loop, securing them to the wire.


Sorry for the bad lighting, but here they are! Hanging in front of our kitchen.


It would be cool to make some large ones (maybe a foot in diameter) to hang from the ceilings for parties. It would be like a flowery disco ball.

Tuesday, February 10, 2009

Pretty, pretty flowers...

I enjoy arts and crafts. I like scrapbooking, jewelry-making, cross-stitching, and especially origami. I started learning origami from my Nai-nai (my paternal grandmother) and then from lots of books. I've missed crafting since being in NYC. Our little studio apartment doesn't leave much room for lots of crafts.

As we've been planning this wedding, I've been trying to think of ways to personalize the event and incorporate origami. My Nai-nai, who is a ripe old 90, also wanted to help out. Which means finding something cool with origami.

I was surfing the web (as I do) and came across a link to a tutorial on how to make Kusudama Balls - Japanese flower balls. It looked relatively easy (Part I and Part II) so I decided to try it out.

I used some random 3 inch origami paper that I had purchased in Chinatown a couple years ago and sorted out a bunch of colors. You have to make each petal separately and then glue each petal together and then glue 5 petals to make 1 flower. Then you glue 12 flowers together to make one ball. Turns out it was pretty easy, it just takes a while.

I started out by folding 5 petals at a time.


Then I glued each one together. I would put glue on one side, roll it together, and pinch it tight as I counted "one Mississippi, two Mississippi..."


Then I would let the petals dry as I folded the next 5 petals.


Then I would have an assembly line started. Fold 5. Glue 5 petals together. Glue 1 flower together. I got into a pretty good rhythm and it was something to do as I watched through a week's worth of the Daily Show and Colbert Report.


After finishing all 12 flowers, I glued 6 together to make the 2 halves. I tried to figure out a way to organize it so none of the same colored flowers touched each other. I don't think my visualization skills were advanced enough.


Look how pretty it is! To finish it off, I would glue a loop of ribbon to one half and then glue them together.


I showed the kusudama ball to my mom over Thanksgiving and she thought they were beautiful and would be something my Nai-nai could help with. Over Christmas, I showed my Nai-nai the ball and how to fold the petals. (We used napkins to practice.) She was very excited about helping out and talked about how she'd be able to fold all of the flowers. She even thought about asking her senior citizen center friends to help but decided against it because "they wouldn't be neat enough." :P

I found some jumbo value pack wrapping paper that should work pretty well. We'll use the balls as aisle decorations for the ceremony (hang them on the chairs right next to the aisle on every other row) and then for the reception (move them to the cocktail tables, place card table, gift table, etc.).

Friday, November 21, 2008

Halloween Part 2: Putting the Look Together (and extra)

To continue on our Halloween costumes, the day of Halloween...

I wanted to make fake Amazing Race clue envelopes for us to hold and run around with. My original ambitious plan was to also write real tasks inside the envelopes and have people open them at the parties we were going to and do the tasks.

"A Detour is a choice between two tasks, each with its own pros and cons. In this Detour, teams must decide to 'Shoot it up' or 'Drink it down.' In 'Shoot it up', each team member must do 1 shot of some kind of strong alcohol. In 'Drink it down', each team member must chug 1 glass of beer."

I couldn't think of many party/bar-related tasks, so I didn't end up doing this.

I looked online for images of the race envelopes to print out, but there wasn't much. I finally found some teeny-teeny images, like little internet icon sized ones, that I decided I would blow up and edit.

I used Powerpoint since I did this at the end of the day at work and it was actually pretty easy and the clues turned out really cute.


I first blew up the image so it fit along the page. Then I used basic shapes to redo the images so they came out sharper. The circle with the bar was made by 3 basic shapes - 1 black circle ovaled a bit and rotated slightly, 1 smaller red circle ovaled and rotated, and 1 black shape made with straight-line connectors. I just lined all of the shapes up with the original image and moved them front and back to get the right order. I also looked for a similar font to redo the titles as well.


To color the rest of the envelope, I basically looked for a color that matched the original image and did a filled shape over the rest of the page. I made 4 types of clue envelopes and also printed out a bunch of the Amazing Race flags. Note the slide sorter on the left.


Here are the completed clues! They looked pretty good! And fairly realistic if I do say so myself.


Here is FI all dressed up with his shirt, clues, backpack, and headlamp. Isn't he a cutie?


Here I am all dressed up as well. Note I am wearing the Amazing Race fanny pack. We borrowed a fanny pack from FI's dad and FI taped an Amazing Race flag printout across the front. While FI stored his clues in the back of his backpack, I put mine in the fanny pack.

Now you may be wondering why we have bits of foil on our heads and on FI's wrists, it's because we were going to Chipotle for dinner. We dressed up like burritos (basically wear some tinfoil) to get a free burrito from Chipotle on Halloween! You don't need wrap yourself in tinfoil, pretty much any bit will do and your meal is free!

The Chipotle employees were pretty tickled by our costumes and one even took some pictures on her camera phone.


FI enjoying his burrito and me enjoying my burrito bowl. While we were eating, we got several questions about the tinfoil on our heads. We happily explained about the free burrito and a couple of guys even "borrowed" our foil pieces to go back in line and get more food. :P

Next post, onto the parties and the great costumes we saw...

Thursday, November 20, 2008

Halloween Part 1: Making Costumes

So this is a bit of a late post, but I still wanted to write about Halloween...

FI and I would be spending our 2nd Halloween together and we needed to figure out what we'd want to be. We wanted to do something fairly inexpensive, something as a couple, and something we could put together ourselves. Last year, we went as Hiro (from Heroes) and Betty (from Ugly Betty). FI keep his hair shaggy, wore glasses, wore geeky middle management clothing, and fashioned a Takezo Kensei sword out of a plastic ninja sword and a belt that he wore over his shoulder. He also ran around yelling "Yatta!" For me, my Betty costume consisted of a pair of red sunglasses (with the lenses popped out) and a fake mustache (that I cut in half) for bushy eyebrows and then the most bright clothing I had assembled into one outfit.

This year we decided to take inspiration from television again and go as competitors from The Amazing Race. We weren't going as a specific couple but the typical racer pair.

With that said, we knew we needed a few key items that all Amazing Racers had:
- matching outfits
- backpacks
- headlamps
- fanny pack with the Amazing Race flag on it (also known as the Amazing Purse)
- lots of Route Clues, Detour, Road Block, and Fast Forward instructions

Prior to Halloween, we made our t-shirts and tried out the headlamps.

We bought iron-on letters and t-shirts from Michael's.


The iron-on letters are very easy to use. You just peel them off the sheet and position them on the fabric.


We decided to go with our friend's suggestion for a team name - Amasian Racers! There weren't quite enough As so we had to improvise by using upside Us and Vs and cutting up an I to cross the modified As.


There are directions on how to iron, but basically an iron on a low to med setting works. You just run the dry iron over the letters until you can see and feel that they're really stuck.


Then we set up the headlamps. We tried to find headlamps at the local Modell's and Target, but they didn't have any. So we went online. FI found some relatively inexpensive headlamps on Amazon - the Wenzel Mini LED Head Lamp - . We asked Stephen to order 2 for us so we could save on shipping.


FI trying to open the package.


FI putting in fresh batteries.


FI testing out the headband.


FI testing out the headlamp. It is really bright. And even though the main purpose of the lamps was to flesh out our costume, they will come in handy when we go camping or do some ourdoorsy night activity.

Our final budget:

$ 13.68 - T-shirts (2), iron-on letters (2 packs) - from Michael's Arts & Crafts (FI also found a coupon online for 20% off 1 item per person, so we each bought a t-shirt and iron-on pack and save 20% on the iron-ons.

$19.98 - Headlamps (2) - from Amazon with no shipping costs (since Stephen had Amazon Prime)

Free - backpacks (our own), fanny pack (borrowed), TAR flag (printed), Paper instructions (Powerpoints that were printed)

Total cost of $33.66 - Not bad for 2 costumes!

Sunday, October 5, 2008

My attempt at being crafty....

When we got engaged, I started perusing wedding blogs for ideas and one of the coolest DIY things I discovered was Gocco! Gocco is a self-printing press that was invented in Japan. It's small and self-contained so it's good for small spaces (like our apartment). What's cool about it is that you can create your own designs and then make multiple prints by putting ink on the design and pressing it onto the paper.

Here are some pretty examples...
(Image courtesy of Lizzy Stewart)

(Image courtesy of kelicatalano)

There are some great FAQs and How-tos online. I read about how to make invitations, thank you cards, and even customized napkins!

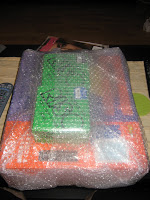
I decided to splurge and buy a Gocco. This came all the way from Japan!

The seller did a great job packaging everything up.

Here's the box of supplies (Surprise!) all opened up. See the tubes and pots of ink. Those are screens on top.

Here's everything laid out. The yellow boxes on the side contain the lightbulbs that you need to flash your image onto the printing screens.

Thank goodness there are instructions. And they come in English too!

I'm excited to use the Gocco for wedding stuff - like thank you cards, programs, place cards, and even maybe the invitations (if I feel especially ambitious).

Thursday, September 4, 2008

My creative RSVP...

For my friend Angela's wedding RSVPs, we were asked to decorate the back of the postcard with whatever you wanted. They said the most creative would get posted at the wedding.

So that became my goal and I ended up sending in the RSVP 5 days late because I wanted to take the time to draw something fun. I know, I know, as a bride-to-be planning her wedding and reading lots of wedding blogs, I know that a late RSVP is one of the most frustrating things to deal with. However, she did ask for creative postcards...

I'm not a great illustrator, but I pencil and letter stuff pretty well. I'm also a huge fan of comic books and I like the sort of descriptive, wordy, stick-figure style of creating comics. I've done this before.

So I decided to do something similar and incorporate the story of how they met (from their wedding website). I used pencil first to create the blocks of space and then penciled in the stick figures and the dialogue. Then I went over each section with a black fine-fine-tipped pen (I got these 0.3MM pens from China that smell like fruity markers and don't skip).

After each section was inked and left to dry, I went back with an eraser and got rid of all the pencil marks. That's actually my favorite part of drawing or lettering. I love seeing all the blurry pencil marks start to disappear. Then you blow on the paper to remove the eraser shavings and the picture becomes all clear and perfect.

Then I went back and colored in some of the drawings to make the images pop. I think adding just a bit of color makes it even more cheerful and stand out more versus filling the whole page with color.

Anyways, if you do actually enlarge the image... they met online via friends, met in person at a Halloween party (he was Kobayashi the hot-dog eating champion and she was a cat) and he proposed at the next Halloween (they were a Chinese emperor and empress).

Monday, May 12, 2008

Math as arts & crafts...

I just finished making a cross-stitch for my best friend's 2nd baby. I put in all the backstitching last night and embroidered her name and birthday.
I love doing the backstitching and personalization on a piece because 1) I'm excited that I'm nearing the end and 2) backstitching always adds a extra layer of detail and realism (in as much as it can to a bear sitting on the moon) that makes the image more alive and clear.

Now it's under a pile of magazines and books. Since the fabric came in a kit, it was folded up and there were heavy creases. I'm trying to flatten it out as much as possible before I frame it. I'll probably have to take a hot iron to it, but it's really hard to get folds out of aida fabric (the graphy fabric used for cross-stitch).


I really like doing cross-stitch for babies and weddings because the final touch is always the personalization. You know the piece isn't going to be given away or regifted because it was made just for them.

Cross-stitching has been a long-time hobby of mine. I like the exactness required, the variations of patterns and design, and I spend the same brain power I use towards puzzles on trying to figure out how to use the least amount of thread and not waste any material. As I do the cross-stitches, my mind is always one step ahead thinking, "Where should I stitch so I don't waste thread and get to the next row of stitches?"

When I started doing cross-stitch, the one thing that stuck in my mind from everything I read was that "the back of your cross-stitch should be as neat as the front." I pride myself on having extremely neat and clean emboirdery backs because it's that much more difficult to do.

I miss sewing on a regular basis. I didn't have room for all my arts & crafts stuff when I moved to NYC, so I haven't done it for a while. Now I'm just working with some all-in-one kits. Next time I go back to VA, I need to dig out all my threads and fabrics and pattern books. One kit probably costs 8 to 10 bucks, but buying all of the materials (threads and fabrics) separately would cost me just 5 bucks and I would be able to do several projects from the same materials. I had a couple of books of hundreds of fonts and lettering designs. I would spend so much time designing a cross-stitch by picking out a font, spelling the name out, counting the stitches, measuring out fabric, picking out colors, and then working on the piece. It was fun to see those come together.