FI and I would be spending our 2nd Halloween together and we needed to figure out what we'd want to be. We wanted to do something fairly inexpensive, something as a couple, and something we could put together ourselves. Last year, we went as Hiro (from Heroes) and Betty (from Ugly Betty). FI keep his hair shaggy, wore glasses, wore geeky middle management clothing, and fashioned a Takezo Kensei sword out of a plastic ninja sword and a belt that he wore over his shoulder. He also ran around yelling "Yatta!" For me, my Betty costume consisted of a pair of red sunglasses (with the lenses popped out) and a fake mustache (that I cut in half) for bushy eyebrows and then the most bright clothing I had assembled into one outfit.
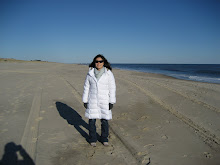
This year we decided to take inspiration from television again and go as competitors from The Amazing Race. We weren't going as a specific couple but the typical racer pair.
With that said, we knew we needed a few key items that all Amazing Racers had:
- matching outfits
- backpacks
- headlamps
- fanny pack with the Amazing Race flag on it (also known as the Amazing Purse)
- lots of Route Clues, Detour, Road Block, and Fast Forward instructions
Prior to Halloween, we made our t-shirts and tried out the headlamps.
 We bought iron-on letters and t-shirts from Michael's.
The iron-on letters are very easy to use. You just peel them off the sheet and position them on the fabric.

We decided to go with our friend's suggestion for a team name - Amasian Racers! There weren't quite enough As so we had to improvise by using upside Us and Vs and cutting up an I to cross the modified As.

There are directions on how to iron, but basically an iron on a low to med setting works. You just run the dry iron over the letters until you can see and feel that they're really stuck.
Then we set up the headlamps. We tried to find headlamps at the local Modell's and Target, but they didn't have any. So we went online. FI found some relatively inexpensive headlamps on Amazon - the Wenzel Mini LED Head Lamp - . We asked Stephen to order 2 for us so we could save on shipping.

FI trying to open the package.

FI putting in fresh batteries.

FI testing out the headband.

FI testing out the headlamp. It is really bright. And even though the main purpose of the lamps was to flesh out our costume, they will come in handy when we go camping or do some ourdoorsy night activity.
Our final budget:
$ 13.68 - T-shirts (2), iron-on letters (2 packs) - from Michael's Arts & Crafts (FI also found a coupon online for 20% off 1 item per person, so we each bought a t-shirt and iron-on pack and save 20% on the iron-ons.
$19.98 - Headlamps (2) - from Amazon with no shipping costs (since Stephen had Amazon Prime)
Free - backpacks (our own), fanny pack (borrowed), TAR flag (printed), Paper instructions (Powerpoints that were printed)
Total cost of $33.66 - Not bad for 2 costumes!
No comments:
Post a Comment